Working with Moulds
Using moulds for A1 panel making
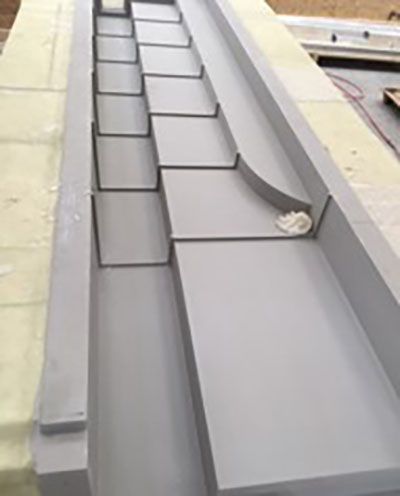
A1 is excellent to process in a mould so that exact copies of the original can be obtained.
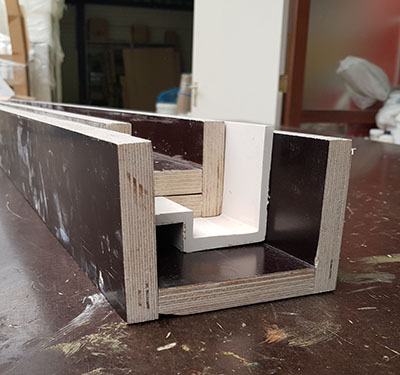
It is possible to use a mould of different materials such as: silicone rubber, concrete forming plywood, PU, polyester, etc.
It is important that no adhesion can take place between the mould and the A1. Silicone rubbers are excellently suited for this purpose and therefore we also recommend working with moulds made of silicone rubber.
A silicone mould has a number of other advantages, such as:
– flexibility of the mould is very useful when demoulding the A1 object.
– Because A1 does not shrink but has a small expansion during the reaction process between the A1 Liquid and the A1 Powder, an exact (detailed) impression of the silicone mould is created.
– A1 does not affect the silicone. This makes it possible to create an infinite number of A1 prints.
A silicone mould may be less suitable for dimensionale stable products. In addition, poor quality silicons (often cheap) with a high fat content can give off, which is sometimes visible on the A1 object.
Moulds made of sheet material such as epoxy plywood forms or polyester moulds work well in practice if provided with a suitable release agent. During hardening, A1 expands slightly. This can cause A1 to get stuck in the mould, especially when it is not self-discharging. Moulds made of gypsum or other porous materials are not recommended unless they have a fully sealing coating or washing system that prevents moisture from the A1 from penetrating into the mould. There is a risk of a (strong) bond between the mould and the A1 and a weakening of the A1 object.
When using a release agent, (limited) release agent may remain on the A1 object after release. Often these release agents are based on fat/oil. This can affect the adhesion of even finishing coats such as A1 Sealer, paint system or an extra layer A1.
Therefore, we advise to limit the use of release agents as much as possible or to work with mould materials that do not bond with A1.
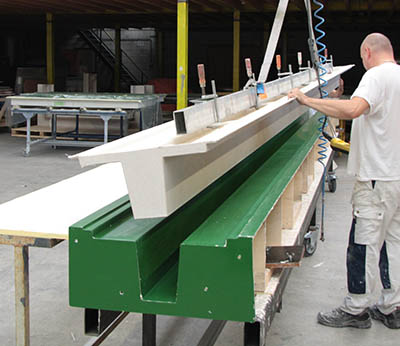
Laminating in a mould
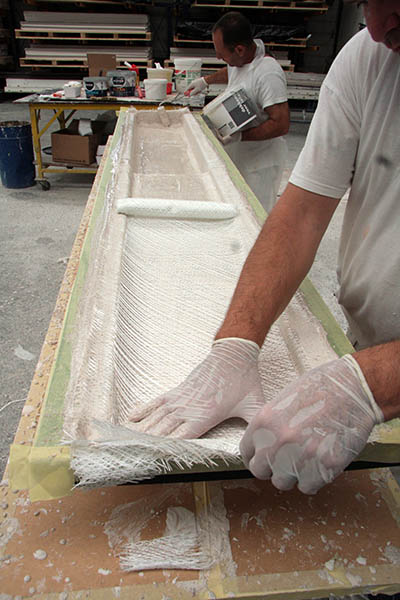
The use of a mould in combination with A1 Triaxial fibre gives the possibility to make strong and lightweight A1 objects.
When we start lamination we first apply a 1st layer A1, possibly thickened with Thix A, often with pigment, sand, metal powder and/or other materials to achieve the desired appearance. Before we start laminating it is important to let this layer dry (maximum 1 hour), to prevent the A1 Triaxial fibre from pressing through.
After applying the top or 1st layer in a mould, the time has come to continue applying the next (glass fabric reinforced) layers A1, when the top layer is already drying but still feels slightly moist. This moment is immediately after the set time of A1 has expired and is also dependent on ambient temperature, humidity and the use of A1 additives. This way you get a good adhesion between the different layers.
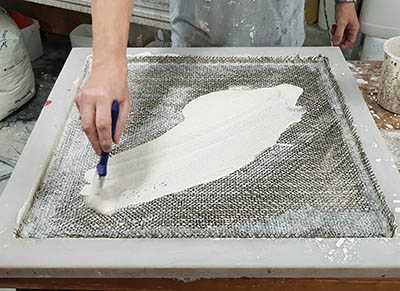
Cut the A1 Triaxial fibre to size in advance and create a new quantity of A1. You now apply the un-thickened A1 to the A1 top layer. Now you can laminate the A1 Triaxial fibre in it. Your brush from inside to outside to prevent any folds. No intermediate drying time is required to apply multiple layers of A1 Triaxial fibre.
If the underlying A1 layer is cured, a thin layer of A1 must be re-applied before the new A1 layer can be laminated with Triaxial fibre (wet in wet work).
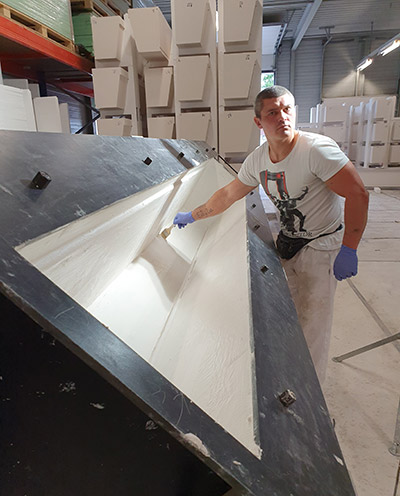
Releasing the mould is often possible after 1 hour. For vulnerable objects, this period may be longer.
We advise that you apply at least 2 to 4 layers of A1 Triaxial fibre. For fixing or capturing vulnerabilities, even 6 to 8 layers or more can be used.
Temperature and humidity
Temperature and humidity affect set time and curing of A1. For larger objects A1 Retarder can be used to extend the set time so that there is more time to work on the A1 object quietly. Provided the processing temperature is not too high and the air humidity is not too low, this is a good way of working.
The use of A1 Retarder for the application of the top layer (gelcoat layer) and in particular when working in moulds, we advise against it in hot weather (above 25°C – 30°C), in combination with low humidity. In hot and dry weather, a dry layer will quickly form on the surface, even before the curing process begins. The curing process seems to begin but the underlay is still soft. The risk of craquelure formation in the top layer and poor curing is therefore high. In addition, the adhesion to other A1 layers will be weaker. If possible, try to avoid working in conditions above 25°C. An alternative is to add A1 Accelerator which will shorten the set time of A1.